This Robot - Mofiza- (weird name) Can SEE, TALK and REACT to her surroundings. Before I proceed watch the video:
Ever since I've seen making talking robots I saw that people actually use other development boards rather than Arduino to make talking robots. But it's completely possible to make a Humanoid robot with Arduino who can talk and add a lot of servos to make it move. So lets begin:
Step 1: Parts You'll Need
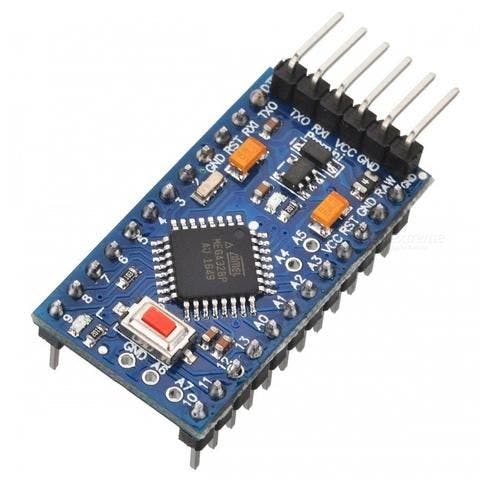
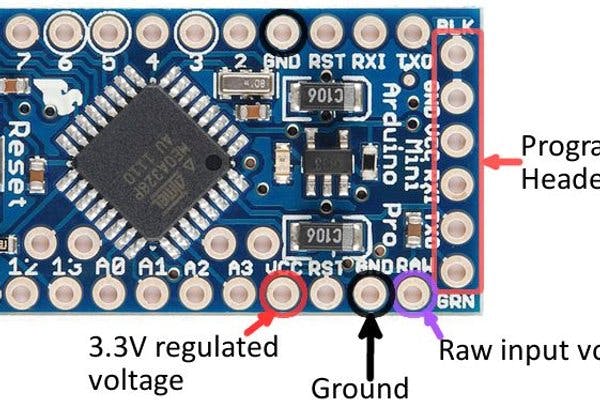
- Arduino Pro mini (5v 16 Mhz) [any board is good but i've used this to make it small)
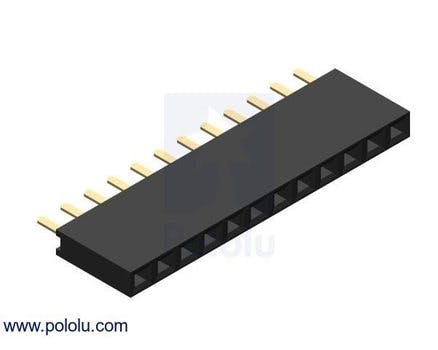
- Female header pins for connecting on pcb
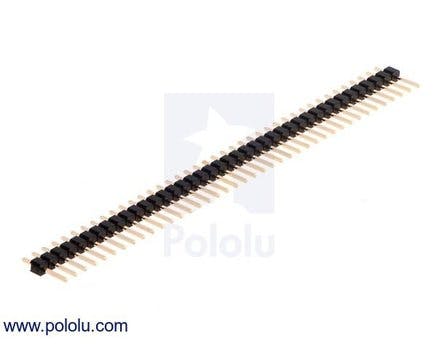
- Male header pins
- Vero Board to make the circuit
- Sd card TF module (to make it talk)
- micro sd card (not more than 2GB)
- 3x IR proximity sensor
- 3x servo motor (I've used micro servo sg90)
- Cardboard to make the body
Step 2: Connecting IR Sensor and the Body

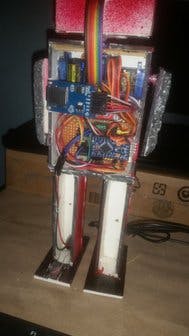
Make a body with anything you want, I've made it by cardboard. It's pretty simple.
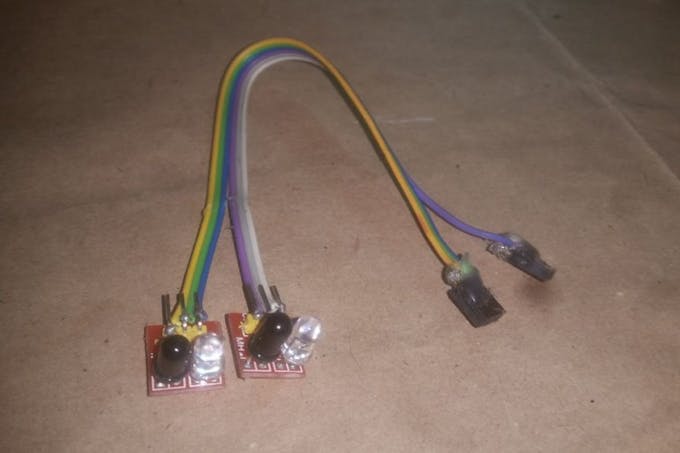
I've soldered IR sensors with ribbon cable just like this with a female header on one end and added two in two eyes and one in the chest.
The robot will say the welcome message if it detects anything in the chest sensor and will say "aaaah.. dont touch my eye" if any eyes sensor is high. and the servo in that are will move up.
Step 3: The Circuit
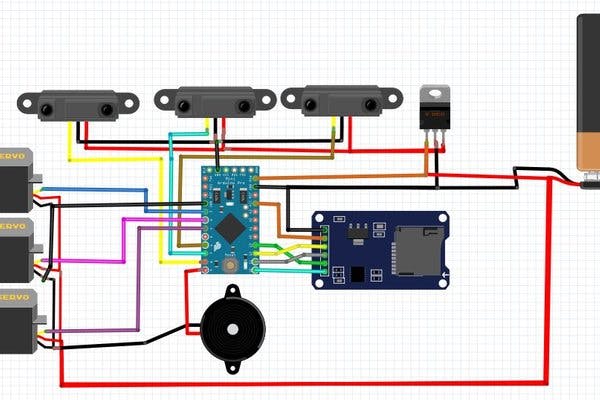
The circuit looks a bit complicated but no its all too easy, you can just power it up by one battery. solder the circuit and all other components in a vero board and add other servo on head and hands.
Step 4: Code
Before the codes:
I had to use two libraries forthis robot.
TMRpcm.h - for playing audio from SD card- talk https://github.com/TMRh20/TMRpcm
ServoTimer2.h - avoid conflict with TMRpcm and run Servo motors using timer2 as TMRpcm uses Timer1 on arduino. https://create.arduino.cc/projecthub/ashraf_minhaj/how-to-use-servotimer2-library-simple-explain-servo-sweep-512fd9?ref=user&ref_id=507819&offset=1
This is the code for saying welcome. You can make your own environment and code. Before you get to code you'll have to add the ServoTimer2 library. Nor the robot wont run.
And then up The code:
/*MOFIZA Humanoid Smart Arduino Robot
By Ashraf Minhaj  ashraf_minhaj@yahoo.com
https://ashrafminhajfb.blogspot.com
http://youtube.com/c/fusebatti */

#include "ServoTimer2.h"      //declare ServoTimer2 library to run servo with TMRpcm
#include"SD.h"                //declare SD library for SD cards
#define SD_ChipSelectPin 10   //select sd chip select pin 10
#include"TMRpcm.h"            //library to play audio from sd card by arduino
#include"SPI.h"              //create Serial peripheral Interface Communication
TMRpcm tmrpcm;              //name tmrpcm
ServoTimer2 head;           //declare Head servo followed by left right hand servos
ServoTimer2 lhand;
ServoTimer2 rhand;

int in1= 6;               //declare Infrared sensor pins
int in2= 7;
int in3= 8;

void setup()
{
head.attach(2);        //attach servos to pins
lhand.attach(3);
rhand.attach(4);
tmrpcm.speakerPin=9;   //Speaker pin 9,audio out pin is 9

Serial.begin(9600);    //initialize Serial communication

if(!SD.begin(SD_ChipSelectPin))   //this runs until SD is connected
{
Serial.println("SD FAIL");
return;
}

}

void loop()
{
if(!(digitalRead(in3)))          //Chest sensor is low- Say "Hi there.."
{
tmrpcm.play("welcome.wav");     //Playing audio saved as 'welcome.wav'
lhand.write(2500);            //hand up- saying HI
delay(2000);
lhand.write(1200);            //hand comes to handshake position

delay(9000);

}

if(!(digitalRead(in1)))       //Sensor on eye gets low play audio -"dont touch my eye"
{
tmrpcm.play("dont.wav");     //play file saved as "dont.wav" - dont touch my eye
rhand.write(300);            //hand up
head.write(2000);
delay(3000);
}

if(!(digitalRead(in2)))     //Sensor on eye gets low play audio -"dont touch my eye"
{
tmrpcm.play("dont.wav");
lhand.write(2000);
head.write(1000);
delay(3000);
}

else             //No input detected - keep the robot steady.
{

lhand.write(300);
rhand.write(1700);
head.write(1500);
}
}
Step 5: Finish
Now just power it up and your'e done. A smart robot is done making. [I'll upload other pictures and details soon]
If I could get more pins I'd make the robot walk. but I had just 3 pins remaining (digital). It's less than I need.
However,I'll make a new version of this robot. Till then stay tuned.
Please tell me how and where to write the welcome message?
ReplyDeleteThe welcome message is actually a wav file. audio file converted for the tmrpcm library. Everything Mofiza talks is pre recorded audio file, in 8 bit rate, audio channel mono etc.
DeleteI want to know where to write the welcome wave
ReplyDeleteI don't understand your question, can you specify?
DeleteCan you tell me how to pre record the audio in sd card
DeleteI just used my phone to record and converted them as .wav file (tmrpcm format too) online.
DeletePlease tell me which voltage regulator you have used?
ReplyDeleteAnd also tell me how to pre record my welcome message in SD card
LM7805 voltage regulator IC. And I recorded some Audio using an app (text to speech and save) after that converted them into wav file online via an online mp3 to wav converter.
DeleteThis comment has been removed by a blog administrator.
ReplyDeletehow can I use ultrasonic sensor instead of IR? is it possible? thanks in advance
ReplyDeleteIt is possible.
DeleteBro i want to make a talking robot if we ask anything to him he can reply like Google assistant
ReplyDeleteYou can see and make this basic robot :. https://youtu.be/I46JJYlR0Lg
Deletethen use NLP to make such an assistant robot. I'll soon make a tutorial on how to make one.
This comment has been removed by the author.
ReplyDeletebro how can install a intelligent taking robot sd card
ReplyDeleteYes you can. But for rather intelligent robot you should use Raspberry Pi.
Deletecan I use raspberry pi zero
DeleteYes you can
Deletehow to install intelligent robot sd card
ReplyDeleteRaspberry pi would be the best choice for that
Deletehow can i connect arduino pro mini with raspberry pi
DeleteSee this robot, it's based on raspberry pi - https://www.youtube.com/watch?v=YkiTT9sYhhY
Deletegood evening, very good video but how can I make it function with Arduino uno. because, I tried reproducing the project but mine doesn't talk but only vibrates(the speaker).
ReplyDeleteHi, yes you can make it using Arduino Uno, in fact any arduino board will do.
DeleteAbout the vibration, perhaps you need an audio amplifier, the sound can barely be heard from arduino. Thank you.
Hi, it’s me again... I’m using an audio amplifier but those vibrations are still there... so I wish to know if you may tell me an appropriate connection for UNO interface please.
DeleteAudio amplifiers cause vibrations because they might have some problems in them, or if the mic is lower than it's capacity.
DeleteHowever, did you try with another arduiono? The connection is same. It should work.
Yeah I had to change arduino twice surely the problem comes from the audio amplifier
DeleteThanks, I'll try bring the change
DeleteWhere can I find the circuit diagram to connect all the parts together. I bought the pc board but can't figure out how to connect it.
ReplyDeleteThere is literally an image of circuit diagram above in the blog.
DeleteI am unable to get any sound from the SD card. I have tried everything as in your instructions. The Serial monitor shows that a wave file is being played, but I get no sound from the speaker.
ReplyDeleteCan somebody help with step-by-step instructions?
TIA.
My be it's not as loud as you expected, use an amplifier. Also, check if the speaker is fine.
DeleteIs there any way to make this without the custom PCB? By just using Arduino, or even multiple Arduinos?
ReplyDeleteYes you can make it without a pcb. Just one Arduino will do the job.
DeleteExcellent content such a great knowledge, thank you
ReplyDeletePower BI Training In Chennai
Power BI Course In Chennai
This post is so interactive and informative.keep updating more information...
ReplyDeleteJava Certificate
Java Learning Course
Great blog!!! The information was more useful for us... Thanks for sharing with us...
ReplyDeletePython Training in Chennai
Python Online Training
Python Training in Coimbatore
This comment has been removed by the author.
ReplyDeleteThis blog contains lot of information about the topic, thanks for this blog.
ReplyDeleteComponents of Spreadsheet
In excel function